Live Chat Software by Kayako |
|
Adding an image to your WordPress post
Posted by on 26 April 2011 04:10 AM
|
|
|
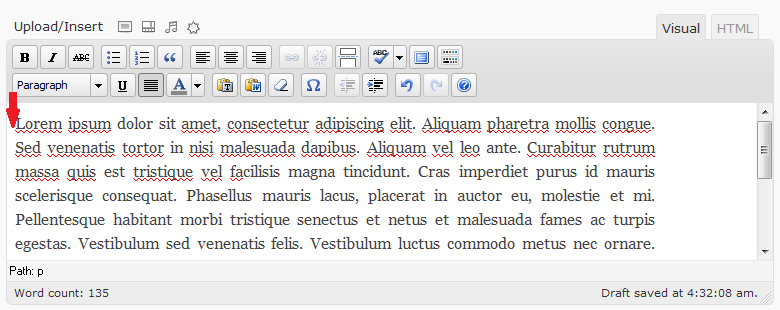
An image can be a useful addition to your post on a WordPress manual posting site as it can catch the attention of site visitors and get them interested. And when they are interested in your post, they could very well click on the link to your site, thus giving you direct traffic Here's how you can add an image when posting manually on a WordPress site: 1. Click the point in your post where you want to insert the image. In the image below, we are inserting the image just before the word Lorem.
2. Click the Add an Image icon. It's right after where it says Upload/Insert above the toolbars.
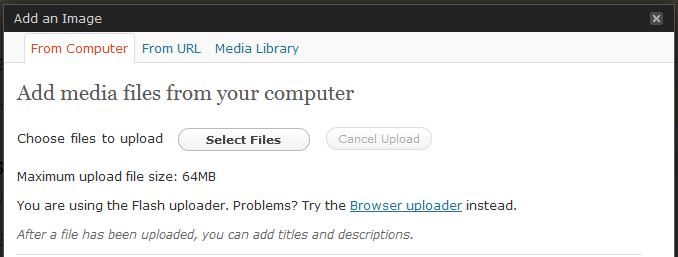
3. The Add an Image screen will come up.
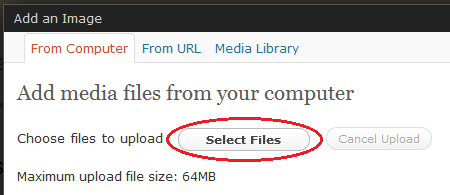
a. If adding an image from your computer: 1) Click the Select Files button on the From Computer tab.
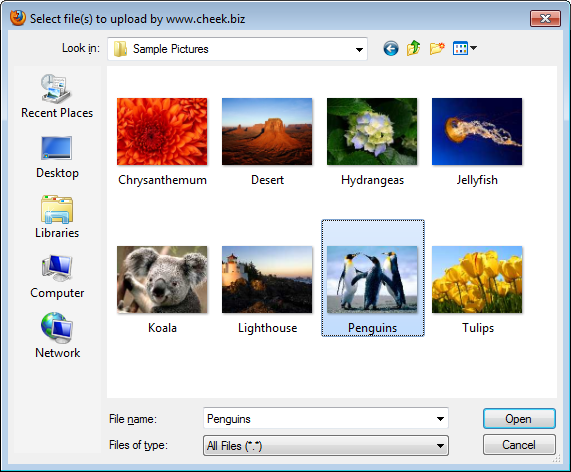
2) In the Select file(s) to upload window, select the image on your computer that you want to insert and then click Open.
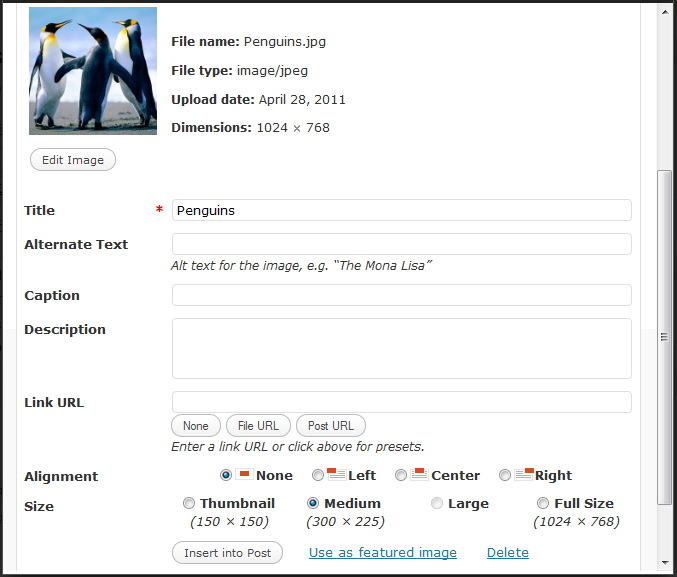
Wait while your image is being uploaded. When the upload is complete, you will then see this screen:
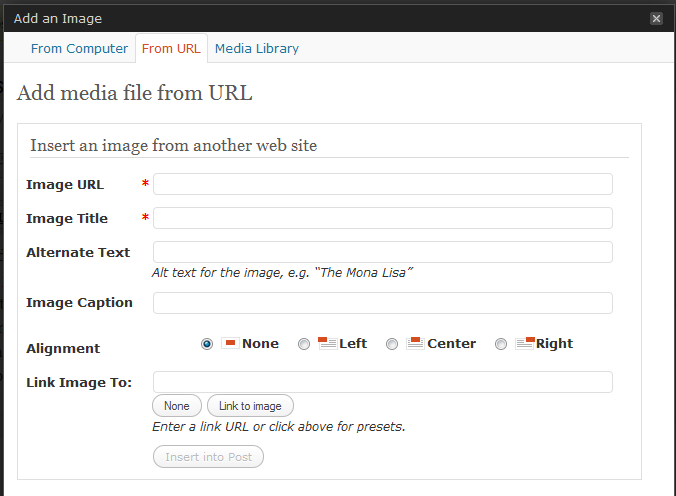
3) Enter the text that you want for Title, Alternate Text, Caption, and Description. 4) Select your preferred options for Alignment and Size of the image. 5) If you wish to embed a link in the image, enter the target URL in the Link URL field. 6) Click Insert into Post. b. If adding an image from a location on the web: 1) Click on the From URL tab.
2) Enter the Image URL. 3) Enter the text that you want for Image Title, Alternate Text, and Image Caption. 4) Select your preferred options for Alignment. 5) If you wish to embed a link in the image, enter the target URL in the Link Image To field. 6) Click Insert into Post. Notes: 1. The Alternate Text should preferably be your targeted keyword. 2. You do not have to put in anything for Caption/Image Caption. 3. If you select None or Center for the Alignment, the image will be on its own line in your post. 4. If you select Left for the Alignment, the image will be on the left side, with text wrapping to its right. 5. If you select Right for the Alignment, the image will be on the right side, with text wrapping to its left. Related Articles: | |
|
|
|

